Ode to Gleaners
November 15, 2007
 I was recently inspired to hunt down a documentary by the French experimental film maker, Agnes Varda (b. 1928), entitled "Les Glaneurs et la glaneuse" (The Gleaners and I) after visiting the Fancy Tiger and inquiring after knitting and sewing classes. While discussing aspects of the arts and craft movement in urban America, the conversation turned quickly to food, my favorite topic. During the discussion of various techniques of food preservation such as canning and drying, I was confronted with a very provocative proposition - dumpster diving and putting recycled goods to use (like clothes, appliances, recycled art, etc) as a form of modern/urban gleaning.
Gleaning immediately invoked in my mind the story of Naomi and Ruth of the Book of Ruth. Aside from the fact that Ruth, a widow, chose to stay with her mother-in-law Naomi and care for her rather than return to her own family, what always struck me about her story was the lengths she went in order not to let her mother-in-law go hungry. At one point in their epic journey, Ruth goes into the fields to glean for food.
Gleaning is an ancient practice of hand-collecting crops from fields after they have been harvested. In some cultures and societies, gleaning is promoted as a form of social welfare by laws (both religious and legal) requiring farmers to leave a portion of their field unharvested and leaving it for the poor to glean.
For instance, the passages of laws from the books of Leviticus and Deuteronomy instruct farmers not to harvest everything, but to leave it to the poor and for strangers: "When you reap the harvest of your land, do not reap to the very edges of your field or gather the gleanings of your harvest. Leave them for the poor and the alien." Leviticus 19:9-10 (NIV version) (see also Leviticus 23:22; Deuteronomy 24:19).
In modern times, societies have either promoted gleaning or crushed the practice all together. In the former Soviet Union, the "Seven Eighths" law, or Law of Spikilets was passed on 7/8/1932 and permitted authorities to arrest peasants and children caught gleaning the leftover grains ("spikilets") in the fields as a crime against state grain production. The French on the other hand, maintain an extensive system of laws that protect the practice of gleaning, as explored in Agnes Varda’s film.
Gleaning is certainly practiced in the modern era, not only by urban homeless in dumpsters, but even my family. As a child, we stalked the public lands of the southwest often for a crop of pine nuts - pulling out our blankets and combing the forest floor for the seeds. You can see these little treasures in my very first blog on Pinon.
While I cannot lay claim to a field or forest nearby for gleaning, gleaning in my town is all about making and following your very own feral fruit map. My boyfriend has this habit of riding his bike around the neighborhood in search of fruit trees such as pears, apples, and alley grape vines and bringing home a grocery bag full of his finds. While I discount this practice as a form of trespass, he always defends himself saying that the fruit just falls off and goes to waste otherwise. Confronted now with the idea of modern/urban gleaning, I have to say he is right.
So with this thought, I bring you the feral fruit harvest of my neighborhood. In one evening, I managed to find pears, apples, and concord grapes. I also decided to follow the feral fruit map method. I found this link about an artist's take on gleaning and the Fallen Fruit movement while researching gleaning and thought it was apt for this blog and a great way to bring some legitimacy to the feral fruit gatherers of your neighborhood in the hope that you join, rather than scorn them.

I also bring you a simple recipe for concord grape juice. While it is very late in the season, some grape vines are still producing the last of their fruit before a hard frost. If you are lucky, you too can enjoy some homemade juice.
You will need:
- 2 pounds of concord grapes
- 3 cups of water
- sugar to taste
Step one: Pick through the grapes and separate the vines, twigs, and leaves out. Wash the grapes thoroughly. Place them in a large stock pot and crush them with your hands. Add the water.
Step Two: Cook the grapes over medium-low heat. You do not want the grapes to boil, rather, you want them to simmer slightly. Cook the grapes for about 30 minutes once they begin to simmer. Add sugar to taste (about 1/2 cup does the trick, and use evaporated cane juice if you can find it). You can also choose to add no sugar if your grapes are overripe.
Step Three: After the mixture cools, strain it through a large sieve or Chinoise (china cap stainless steel strainer). Pour the juice into a container for storage in the refrigerator.
Note: the picture of "The Gleaners" is an oil on canvas from 1857 by Jean-François Millet.
Labels: agnes varda, feral, fruit, gleaners, grape juice, harvest, traditional
Green Chile Bounty
September 06, 2007

The labor day holiday, while an excellent homage to the common man, is also the peak of the green chile roasting season. For those obsessed with the recent seasonal food craze, there is no other season more perfect than late August and early September - during this delicate 4-6 week period, the green chile harvest begins and quickly ends in the smoke of open pit grill fires or cylindrical roasters throughout the southwest.
Green chile is consumed by the bushel in my family, and I couldn’t wait to get mine this year with my mom. For my boyfriend, this was the first time he’d ever had to prepare green chile for freezing, and some explanation was required, which I give you here.
First, what are green chiles? Why they are the most deliciously edible member of the nightshade family of course! Oddly, many of the new world’s foods that are a part of the staple diet in Mexican homes is from the nightshade family: potatoes, chiles, and the famous tomato (of which Europeans were very suspicious knowing that the nightshade is also lethal in some strains). What makes chile so special is the capsicum - a chemical that encapsulates the seeds and forms pockets on the inside of the chile giving the fruit its intense or not-so-intense heat. Chiles come in many shapes, sizes, colors, and levels of sweet (i.e. a bell pepper), to practically lethal (i.e. habanero). The chile consumed by so many Mexicans of the southwest (and I iterate here "of the southwest"), is largely the variety known as Anaheim (which includes sub-varieties like Big Jim, and Pueblo Short).
Diversion: Now, my brother-in-law is from Mexico, but he sure doesn’t eat GREEN chile - that is because for some strange anthropological reason I don’t know, the Mexicanos and Indios of the southwest liked to work twice as hard as their southern counterparts and harvest chiles twice a year as opposed to once a year. Yes, you heard it here first, the red chile you eat in chile con carne, or some other noxious combination peddled in some awful Tex-Mex aisle of the grocery store is really just ripened green chile that has been dried and usually ground up. As you know from my other posts on how to make red chile for enchiladas, I usually re-hydrate whole dried red chiles from a ristra to make red chile. However, in New Mexico and southern Colorado, the folks really like their ground chile molido - the powder variety. I can never give you my recipe for red chile made from the powder though or else my mother would kill me. Sorry.
Okay, enough about red chile, back to green. So basically, the theory is that very dry and tough arid climates are good homes for growing chile. It is a hardy plant that will yield fruit in the most sun beaten conditions - ergo, New Mexico. All that "Hatch" chile talk is really just chile grown in the region of Hatch, New Mexico. It is famous for chile because it had good marketing tactics - but also because the dry and intense heat of that town contributes to the Hatch grown chile’s thick skin and good range of milds to scorching hot. Now, the New Mexico harvest occurs about 1 to 2 weeks prior to the southern Colorado harvest. This is why you can buy into mid-September if you are in Colorado.
Every year, my family ventures south for a big chile roasting shindig. We eat chile throughout the year that has been properly bagged in ziplocks and frozen until eaten. Sometimes, if my Mom and I feel really adventurous, we can our chiles in little glass jars with garlic, tomatoes and onions. It is a lot of work and requires some crazy canning skills like you’ve never seen before - it’s like Texas Ranch House got together with Fifties House on PBS and put Mexicans in it instead of Gabachos.
So here you are - in line with a bunch of other hungry folks, Gabachos and Mexicans alike, waiting for your turn in the roasting line. My mom told me that when she was a girl, there was a big shift in the green chile vendor market - someone got the bright idea of using a metal cylindrical cage to roast the chile in over a natural gas burner. This method permits you to roast a whole bushel at once, in about 20-30 minutes. This practice has remained the standard ever since. So, you order your bushels and varieties (usually labeled simply as Mild, Medium, Hot, Extra Hot, and Ejola!), have it roasted; it gets placed into a large plastic garbage bag and placed in a cardboard box, and you take it home. You carefully open the bag after about 30 minutes (to let the steam settle and not burn your face off), and then you start bagging the chiles in quart size ziplock baggies for freezing all winter long. You also eat about 30 tortillas filled with the peeled chiles, along with some ajo picado and onion, with salt, and try not to rub your eyes. MMMMMMM.
Now I realize you’ve read this far hoping that I will give you a recipe. So I will - a simple one that I will call plainly and perhaps misguidedly a "relish."
You will need:
- 8 to 10 roasted and peeled green chiles
- 4 cloves of crushed and minced garlic
- ½ minced white onion
- kosher salt
- flour tortillas
Step One: Chop up those chiles as fine as you can. I recommend that if the chiles are frozen, thoroughly thaw them first, then peel, de-seed, chop the stem off, and then proceed to chop away in front of the tele.
Step Two: Throw your garlic into the mix and continue chopping. Add the onions, chop chop.
Salt to taste. Eat this on a tortilla and its like you were at the chile harvest all over again. Perfect for eating on top of anything - chips, hotdogs, birthday cake, etc.), and guaranteed to make you cry.
Labels: chili, green chile, harvest, New Mexico, roast, traditional
Chico Soup with Red Chile
November 15, 2006
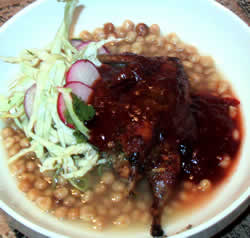
Having worked so hard this fall to prepare the chicos, I was pleased to make chico soup with a twist. While most chico soup recipes call for roasted beef ribs, pork, or chicken, I decided to use a traditional Mexican game bird instead: the humble quail.
This recipe has three main parts: chicos, quail, and red chile. I suggest you make the red chile in advance and freeze the leftovers for other dishes like enchiladas or huevos rancheros. The quail can be made using my unique Garlic and Cumin pesto recipe. I have posted this recipe separately so as to give you a better perspective about the ingredients that can go into chicos, but also to edify the glorious little kernels that can be eaten all by themselves.
There are few things as simple and tasty as a pot of fresh cooked chicos. All that is required is water, chicos, pressure and time (sort of like the creation of igneous rocks, minus the chicos). First, you will need the following:
- 1 c of chicos
- 5 c of water
- salt to taste
- pressure cooker or crock pot
Step One: To clean the chicos, take the chicos out of the bag and spread them on a table. Pick out the burnt chicos. Place chicos in a small bowl,and slowly pour them into another bowl while blowing on them. This process removes any excess chaff on the kernels that remains. Rinse chicos in a colander or sieve.
Step Two: Place chicos and water in a crock pot or pressure cooker. Understanding the size of your cooker may vary, you can add 4 c of water instead of 5 c (I just like a lot of chico juice). If cooking in a crock pot, cook on low overnight and immediately turn off in the morning (about 8 hours later). If cooking in a pressure cooker, cooking time will be 50 minutes after the pot starts to "chiar" or hiss. remove from the heat and cool. Serve in bowls with salt to taste, or add red chile for good measure.
Chicos are traditionally served in a fresh pot of beans or with a meat of some kind. You can use beef, chicken, or whatever game bird or other meat you like. My next post contains a recipe for garlic-cumin pesto quails over chicos in red chile. My only caution is that the quails must be cooked right before serving on order to keep them tender and juicy, otherwise they dry out in the oven and turn that horrid grey color that many game birds turn when overcooked. EEK! For now, enjoy the simplicity of cooked chicos with salt and perhaps a bit of chile.
Labels: chili, corn, green chile, New Mexico, red chile, soup, traditional
Making Chicos Part Dos
November 07, 2006
 As promised, here is Part Dos of the Chicos post. The photo illustrations take the chico making process described in last week's post through to the end. We left off last when Faustina placed the last of her corn in the horno for roasting and mudded up the doors. The picture here is of her and her comadre washing their hands of the mud used to seal the doors closed for the night. The horno door, if you notice, is being chipped away here the next morning. The door had mud bricks on the inside of the oven, and a layer of adobe on the outside.
After breaking down the doors which were extremely hot from the overnight fire, Faustina reach into the oven with a pitchfork and her bare hands to remove the husks from the dying the embers. She placed the corn in a wheelbarrow and moved them to the back of a pick-up truck where myself, Faustina's comadre, and her brother stood with small paring knives.

At the truck bed, each of us took the corn husks, pulled them back, stripping the excess layers of silk and husk. We cut off the bottom stem of the corn to shorten it for drying. Faustina gathered each ear of corn we cleaned and she braided the thinned husks together to form a ristra. A ristra is made with corn or chiles by stringing the chiles or corn to dry outside in the sun. Faustina quickly braided about 12 ears of corn together to be strung up on her drying rack pictured here.
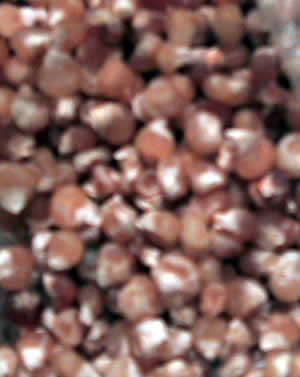
 Chicos need to be dried in the sunshine for several days until the kernels turn hard and wither into a dark brown. The chicos are then taken off the drying rack and rubbed together to remove the dried kernels. At this point, they can be stored in plastic bags or containers for storage year-round until they are cooked.
Faustina sent me the product of our labor not to long ago and I made quite a delicious chico soup. I promise to post that recipe for your enjoyment as well. Again, I'd like to acknowledge Faustina's kindness and generosity for taking the time to expose me to such an ancient art of food preparation.
Labels: corn, New Mexico, traditional
Making Chicos (that's roasted dry corn, not little boys!)
November 02, 2006

It is Dia de los Muertos (Day of the Dead) and it is time to feed your dead relatives and visit them at the cemetery. Traditionally, people leave candies and food by a loved one's graveside to celebrate and remember them. On this day, I am going to remember my dead with a post about chicos, and follow-up with a chico recipe.
Do you know what a chicos are? Well, if not, you'd have to ask someone in Southern Colorado or Northern New Mexico because not many others could tell you off the top of their head. As half of each, I can tell you with confidence that I know what chicos are: a roasted and dried ear of corn, the kernels removed and stored until cooking time. To tell you the story of how to prepare chicos however, I will employ many pictures from a recent visit I made with an elder relative who lives in my parent's "town" (if you can call it a town). Her name is Faustina and she is as old as her house (about 78), and she let me join her, her brother, and sister-in-law in the making of the chicos. What I share here are merely the impressions of that two day visit and by no means can capture the immense knowledge Faustina has of traditional food preparation techniques. All that I share is what Faustina was generous enough to teach me and I hope that these photographs will help preserve the traditions she has maintained for all of her life.
This post will be split into two to accommodate the explanations of the processes of preparation and actual recipes for cooking chicos. Additionally, I hope a two-part series will make reading the post easier.
To begin, I should give you some background about chicos and their origin. When I first moved to New Mexico, I was surprised to find chicos at the local Smiths grocery store in bulk. As a child, I remember having to track someone down on the side of the road selling them, or go to neighbors who toiled away to make any that year and buy them. The cost is usually around seven to ten dollars per pound because of the intense preparation required to make them. It was in New Mexico that I also learned that several Native American Pueblos had a delicious chico soup of some kind or another very similar to the type I grew up with as a Mexican-American. This is no coincidence however, because Pueblo peoples also introduced desert farm techniques to even make corn patches a possibility in the harsh climates of Northern New Mexico and Southern Colorado.
According to a student paper published on-line at New Mexico State University in Las Cruces: "Chicos are corn in the soft dough stage that has been steamed in the husk and dried. Traditionally, a pit was dug in the ground and the soil heated by burning wood in it for 1 to 2 days. The fire is removed and green ears in the husks are then placed in the pit and covered with soil. The partially roasted ears are removed, the husks stripped back, and the ears tied together in pairs and hung out to dry. The kernels were roasted to kill the grains, and to help them dry faster to preserve their food value. Chicos are generally cooked with chile and green onions, or in stews."
Apparently, chicos are also highly thought of in the slow food community who had this to say about chicos: "Chicos . . . . are small and wrinkled in appearance, and if the corn was roasted before drying, it can be very dark as well. When they are cooked . . . they swell up to their former size and taste like freshly smoked corn. . . . Chicos are made in two different ways. In the first method field corn is picked, shucked, then tied into ristras (strings) and hung to dry or alternatively, dried on screens. Once dehydrated, it is rubbed off the cob, and cooked until the kernels become clear, giving the corn a sweet, fresh taste. In the second method, white or yellow field corn is picked but not shucked, then put into a horno (adobe oven) to roast overnight. It is then tied into ristras and hung in the air to dry. Once the kernels are completely dried out, they are rubbed off the cobs and stored until ready to use. The kernels are dark from being roasted, and the roasting enhances their taste, adding a smoky flavor. Chicos are traditionally made by the American Indian nations of the southwest US as well as by the Hispanic culture that settled in the region hundreds of years ago."
Fau
 stina follows the method of cooking chicos that requires an initial roasting, then shucking and drying of the corn. In Mexico, it is much more common to simply dry the corn in piles rather than roasting before drying. To facilitate the roasting process, Faustina does not use a pit, but rather a traditional adobe horno (outdoor oven) that she and her brother constructed that she uses to bake breads and roast her corn (pictured on the left). Hornos have a solid adobe or poured concrete base, and a dome of adobe bricks that are covered with a layer of mud. The oven also has a small hole in the top for smoke, and a door in the front that can be blocked with more bricks for cooking, or simply a sheet of metal. To see the steps of construction, check out this link on New Mexico Culture Net.

After Faustina's sweet corn was ready to be picked, she lit a fire in the hornos and stoked them all night long until the morning. When the embers were still red, she placed her ears of corn inside, poured in a bucket of water, and sealed the horno door up with adobe bricks and mud. The mud was mixed on-site by her brother (pictured far left). The mud was used to fill in any cracks in the adobe ovens so that no heat escaped (pictured in center-left). The ears were left overnight in the oven to smoke and roast.

The process of preparing the ovens and placing the corn inside to roast was not simple. Faustina, in addition to roasting and drying her own corn, also grows her own corn. She hand picked the corn along with her brother and sister-in-law, and then prepared the ovens. She uses a sweet white corn she's grown for many years. When buying from the store, it is common for people to use a sugar queen variety of corn to make chicos.
For the next "Making Chicos" installment, I will present the story of removing the corn from the ovens, braiding, and drying it. I will also be posting a recipe later on that I am sure will inspire many of you to hunt down a roadside stand in New Mexico that sells chicos. If you can't make it there however, try the Albuquerque Tortilla Company on-line store.
Labels: corn, New Mexico, traditional
Going to the Pinion
October 16, 2005

If you are lucky enough to live in southern Colorado or northern New Mexico, then you are already well aware of the bounty of pinion this year. For those of you reading this from lands beyond the southwest, please let me be the first to boast about this rare delight. Driving down I-25 between Las Vegas (NM) and Santa Fe, one may encounter an endless line of parked cars on the side of the highway appearing all but abandoned. If you are wondering why these cars are there, then you have never "gone to the pinion." Every few years (about 3) pine trees in the southwest are blessed with enough precipitation to yield pine nuts from the pine cone. While many of you have collected pine cones for silly crafts and Christmas ornaments, Mexicans are out in droves shaking all the nutty goodness out of these cones. "Going to the pinion" is an activity I loathed and loved as a girl. My father would pack his truck with tarps, buckets, and a cooler full of food. My sisters and I would sit in the truck while my dad meandered along forest roads looking for the fullest pine trees in the forest far away from other would-be pinion hunters. We would unload our equipment and tie bandanas around our heads. My dad arranged the tarp on the ground around the base of a tree and climbed halfway up in order to shake the tree top. Pine needles, cones, branches, bird nests, and eventually pine nuts came raining down on the tarp. We picked up each pine nut by hand and threw it into the buckets. When we finished with the tarp, we removed it and continued foraging around for pine nuts on the forest floor. This outdoor activity went on all day as long as there was light. We would go home, my mom would wash the sap out of our hair, and my dad would wash and prepare the pinion. He roasted the pinion on sheet pans in the oven. After the pinion cooked, my dad bathed the pinion in a salt bath and laid them over a cotton cloth on the kitchen table to dry. The next morning, we would all wake up extra early to start snacking on the fruits of our grueling labor. If you are still reading this and wondering why Mexicans are hunting around for pine nuts in the forest, all I can say as that this activity is unique to the southwest among both Native Americans and Mexicans alike. Also, if you are wondering why pine nuts cost about $10 - $15 per pound, now you know. So, if you are driving along the highway and notice a fertile pine tree calling your name, stop, stoop, and pick. P.S. don't pick a "smart ball" - it tastes like s***!
Labels: harvest, New Mexico, traditional
